
Branch Out Mittens | FREE Crochet Pattern & Video Tutorial | Top-Down Crochet Mittens
- kkrochets
- Nov 4, 2022
- 6 min read
Updated: Jun 10, 2023
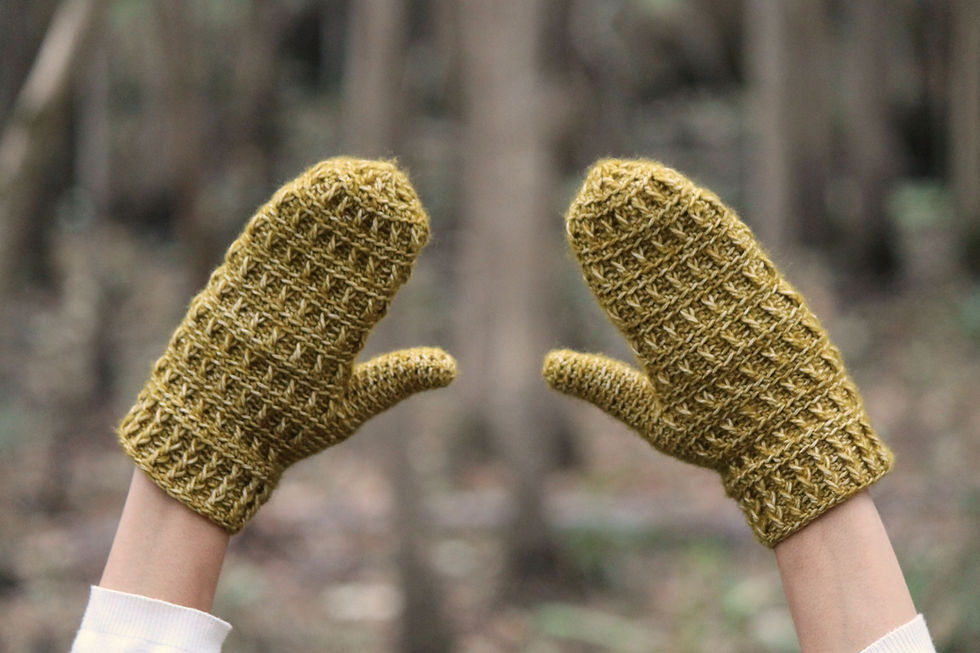
A stylish way to keep the whole family's hands warm!
Scroll down for the FREE written pattern, grab the affordable, ad-free pdf on Etsy or Ravelry, or watch the step-by-step video tutorial on my YouTube channel!
This post contains affiliate links. All that means is that I get a tiny commission if you purchase something by going through one of my links at NO extra charge to you! It helps support my business, making it a win-win for everyone!
ABOUT
These snug fitting hand huggers were made to match the Branch Out Beanie. They're lightweight and flexible, completely covered with unique texture, and can be worn by men, women, boys, and girls! They're worked from the top-down, allowing you to try them on as you go, and are quick to create, making them perfect for last minute gifts or craft fairs.
The pdf includes easy to follow, row-by-row instructions for 3 sizes (child, adult, and large adult) and a link to a full video tutorial, so there's no confusion!


CONSTRUCTION
The Branch Out Mittens are crocheted from the top-down, in joined rounds. You'll start by making and finishing off the thumb piece. Then, you'll work the upper mitten and connect the thumb for a "seamless" look. You'll finish with the base ribbing.

BEHIND THE DESIGN
These mittens are a part of the Branch Out collection which has been an ongoing collaboration with Taylor, from @yarnaddicted! It all started with the beanie and I'm not sure what it's going to end with. (I'm just too obsessed with the texture!)
Use code NEVERENOUGHBRANCHES on Ravelry to get the entire collection 30% off!


TOP LEFT: Branch Out Raglan
TOP RIGHT: Branch Out Beanie
BOTTOM LEFT: Branch Out Cardigan
BOTTOM RIGHT: Branch Out Shawl
TESTERS
Below are the mittens that were made during testing. Each talented crocheter gave up time, used up yarn, and shared knowledge to help make this pattern what it is and for that, I'm truly grateful. Click on each photo to see more of each maker's work on Instagram!


SIZES & MEASUREMENTS
CHILD (ADULT, LARGE ADULT)

MATERIALS NEEDED
HOOKS
3.5 & 4 mm crochet hooks (or hook needed to obtain gauge and .5 mm smaller hook)
YARN
Approx. 1 (2, 2) balls of Stone Washed by Scheepjes (or 140 (190, 240) yards of Merino Camel by Lion Brand Yarn, Wool of the Andes by KnitPicks, or any sport weight yarn.)
NOTIONS
ABBREVIATIONS
- bl: back loop
- bldc: back loop double crochet
- blsc: back loop single crochet
- ch(s): chain(s)
- dc(s): double crochet(s)
- f/o: finish off
- flsc: front loop single crochet
- fpdc: front post double crochet (see page 3)
- inc: increase
- rnd: round
- sc(s): single crochet(s)
- slst: slip stitch
- st(s): stitch(es)
- x: time(s)
GAUGE
19 sts x 14 rows = 4” x 4” (with 4 mm hook)
Ch 20
ROW 1: sc in 2nd ch from hook, sc in each ch across, turn – 19 sts
ROW 2: ch 1 (does not count as st), blsc in each st across, turn – 19 sts
ROW 3: ch 1, flsc in each st across, turn – 19 sts
ROWS 4-14: Repeat ROWS 2 & 3.
DIFFICULTY: Intermediate
NOTES:
- Mittens are worked from the top-down, in joined rounds.
- The beginning ch 1 never counts as a st and should always be tight.
- You will not be turning at the end of each rnd.

SPECIAL STICHES
Front Post Double Crochet: y/o, place hook around post 2 rows down (going from right to left), y/o, pull up a loop, y/o, pull through 2 loops on hook, y/o, pull through last 2 loops (See video tutorial.)
NOTE: When working a fpdc around a sc rnd, place your hook around the vertical bar below and between the single crochet posts. (See example photos below.)

PRINT THE PATTERN
Grab the affordable pdf on Etsy or Ravelry! It includes color-coded instructions for sizes child, adult, and large adult, plus it's printer friendly and ad-free!
VIDEO TUTORIAL
BRANCH OUT MITTENS PATTERN
REMINDERS:
1. Beginning ch never counts as a st. Always make it tight.
2. You will NOT turn your work at the end of each rnd.
THUMB
With larger hook (4 mm), make a magic circle.
RND 1: ch 1, place 5 (6, 8) scs around magic circle, tighten, slst in bl of first st – 5 (6, 8) sts
RND 2 (INC RND): ch 1, place 2 blsc in each st around, slst in bl of first st – 10 (12, 16) sts
RND 3: ch 1, blsc in each st around, slst in bl of first st – 10 (12, 16) sts
Repeat RND 3 until thumb measures 1.5 (2.5, 3)". F/o leaving a 5" tail and put aside. Continue to UPPER MITTEN.
UPPER MITTEN
With larger hook (4 mm), make a magic circle.
RND 1: ch 2, place 8 (10, 12)dcs around magic circle, tighten, slst in bl of first st – 8 (10, 12) sts
NOTE: In the next rnd, you will NOT skip a stitch behind the post st since it counts as an inc.
RND 2 (INC RND): ch 2, bldc AND fpdc in each st around, slst in bl of first st – 16 (20, 24) sts
RND 3 (INC RND): ch 1 (never counts as st), *blsc, 2 blsc*, repeat ** around, slst into bl of first st – 24 (30, 36) sts
RNDS 4-5: ch 1, blsc in each st around, slst into bl of first st – 24 (30, 36) sts
NOTE: See example photo on page 3 for fpdc placement.
RND 6: ch 1, *blsc, fpdc*, repeat ** around, slst into bl of first st – 24 (30, 36) sts
RNDS 7-9: ch 1, blsc in each st around, slst into bl of first st – 24 (30, 36) sts
Repeat RNDS 6-9 (ending with a RND 6 repeat) until mitten measures approx. 4 (5, 6)". Do NOT f/o. Continue to RIGHT HAND. (If you’ve already made RIGHT HAND, continue to LEFT HAND.)
RIGHT HAND
RND 1: ch 1, blsc in first st, grab thumb piece and blsc into first st (see example photos below), blsc around until 2 sts remain on thumb, skip last 2 sts on thumb, skip 2 sts on upper mitten, sc in next st on upper mitten, blsc in each st around upper mitten, slst into bl of first st – 30 (38, 48) sts
NOTE: You’ll seam hole later.

RNDS 2-3: ch 1, blsc in each st around, slst into bl of first st – 30 (38, 48) sts
RND 4: ch 1, blsc in next 11 (13, 17)sts, fpdc, *blsc, fpdc*, repeat ** around, slst into bl of first st – 30 (38, 48) sts
RNDS 5-7: ch 1, blsc in each st around, slst into bl of first st – 30 (38, 48) sts
Repeat RNDS 4-7 until entire mitten measures 6.5 (7.5, 8.5)" (making sure to end on a RND 7 repeat). Continue to RIBBING.
LEFT HAND
RND 1: ch 1, blsc in each st around until 3 sts on upper mitten remain, sc in next st, skip last 2 sts on upper mitten, grab thumb piece, blsc in 3rd st on thumb (see next example photos), blsc in each st around until 2 sts remain on thumb, skip 2 sts, slst into bl of first st – 30 (38, 48) sts
NOTE: You’ll seam hole later.

RNDS 2-3: ch 1, blsc in each st around, slst into bl of first st – 30 (38, 48) sts
RND 4: *blsc, fpdc*, repeat ** around until 10 (12, 16)sts remain, blsc in remaining sts, slst into bl of first st – 30 (38, 48) sts
RNDS 5-7: ch 1, blsc in each st around, slst into bl of first st – 30 (38, 48) sts
Repeat RNDS 4-7 until entire mitten measures 6.5 (7.5, 8.5)" (making sure to end on a RND 7 repeat). Continue to RIBBING.
RIBBING
Switch to smaller hook (3.5 mm).
RND 1: tight ch 1, *blsc, fpdc*, repeat ** around, slst into bl of first st – 30 (38, 48) sts
RND 2: tight ch 1, blsc in each st around, slst into bl of first st – 30 (38, 48) sts
RND 3: tight ch 1, *blsc, fpdc around fpdc*, repeat ** around, slst into bl of first st – 30 (38, 48) sts
RND 4: tight ch 1, blsc in each st around, slst into bl of first st – 30 (38, 48) sts
Repeat RNDS 3 & 4 (ending with a RND 3 repeat) until ribbing measures approx. 1.5" (or desired length) and f/o. Continue to FINISHING.
FINISHING
1. Flip mitten inside out and with a blunt threading needle, seam hole near the base of the thumb by using the long tail from the thumb piece. When seaming, work under at least 2 strands of yarn for less gaps. (I started in the corner sc sts, then worked across the 2 unworked sts, and finished in the other corner sc sts. See next example photos.)

2. With the mitten still inside out, weave in all ends.
3. Repeat PATTERN for left-handed mitten.
Voila! You now have yourself a pair of awesome mittens. Thank you so very much for supporting me. I hope you like the design as much as I do! Don’t forget to tag #BranchOutMittens and #KayKrochets on social media so I can see your new creation! Also, if you have a spare moment to review the pattern on Etsy or add it as a project on Ravelry, I would truly appreciate it. Have a fantabulous day and never forget that the maker of this universe adores you!
❤ Kayla


Comments